Prerequisites
- You have administrator rights to install software
Step 1: Begin installing Agent software on remote device
- In a browser, log into your maiLink account at app.maidata.io.
- Navigate to the Software tab.
- Locate the proper version, for example 64bit linux, mailink-agent_{version}_linux_amd64.deb, right click and copy the Link/URL.
- Go to your Terminal window and navigate to your home directory run the following command. Your coppied url will vary.
wget https://github.com/maiData/releases/releases/download/{version}/mailink-agent_{version}_linux_amd64.deb
- Run the following command (replacing version) in the directory you have transfered the .deb file to.
sudo apt install ./mailink-agent_{version}_linux_amd64.deb
Output
Reading package lists... Done
Building dependency tree
Reading state information... Done
Note, selecting 'mailink' instead of './mailink-agent_22.5.3_linux_amd64.deb'
The following NEW packages will be installed:
  mailink
0 upgraded, 1 newly installed, 0 to remove and 105 not upgraded.
After this operation, 13.8 MB of additional disk space will be used.
Get:1 /home/maidata/Downloads/mailink-agent_22.5.3_linux_amd64.deb mailink amd64 22.5.3 [5,537 kB]
Selecting previously unselected package mailink.
(Reading database ... 108002 files and directories currently installed.)
Preparing to unpack .../mailink-agent_22.5.3_linux_amd64.deb ...
 Please provide the device key:
 :>
Progress: [ 20%] [#####################.....................................................................................]
- Leave the installer as shown above and proceed to Step 2.
Step 2: Create the Device in the maiLink Cloud.
- Navigate to the Devices page.
- Click on Create Device.
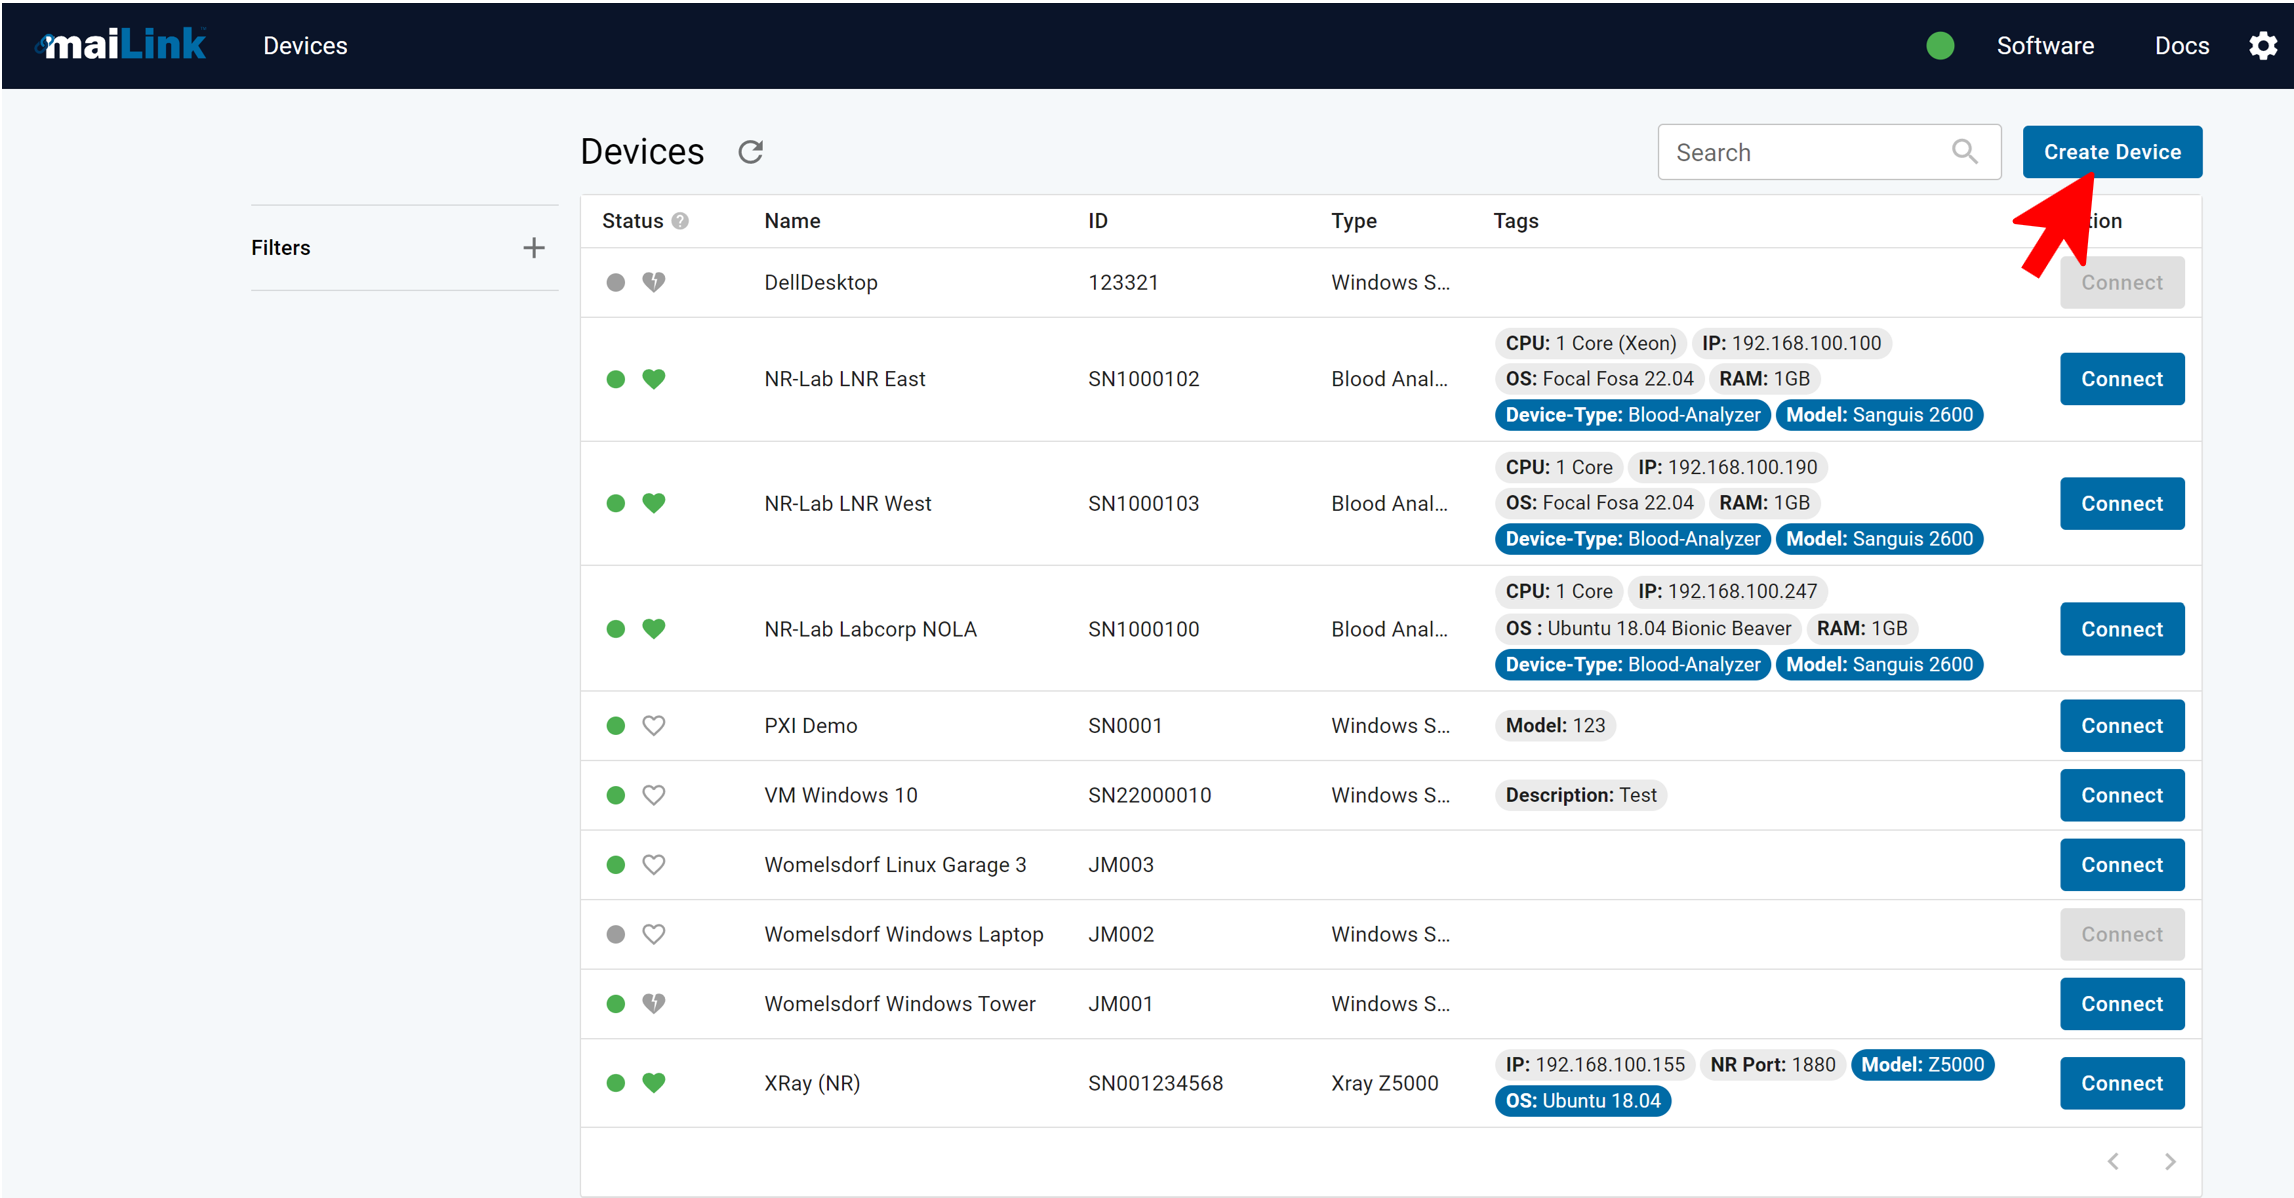
- Enter a Device Name and Device ID (Serial Number is recommended).
- Click + to add tags that help identify the system, such as:
- Site Name
- Address
- IP Address
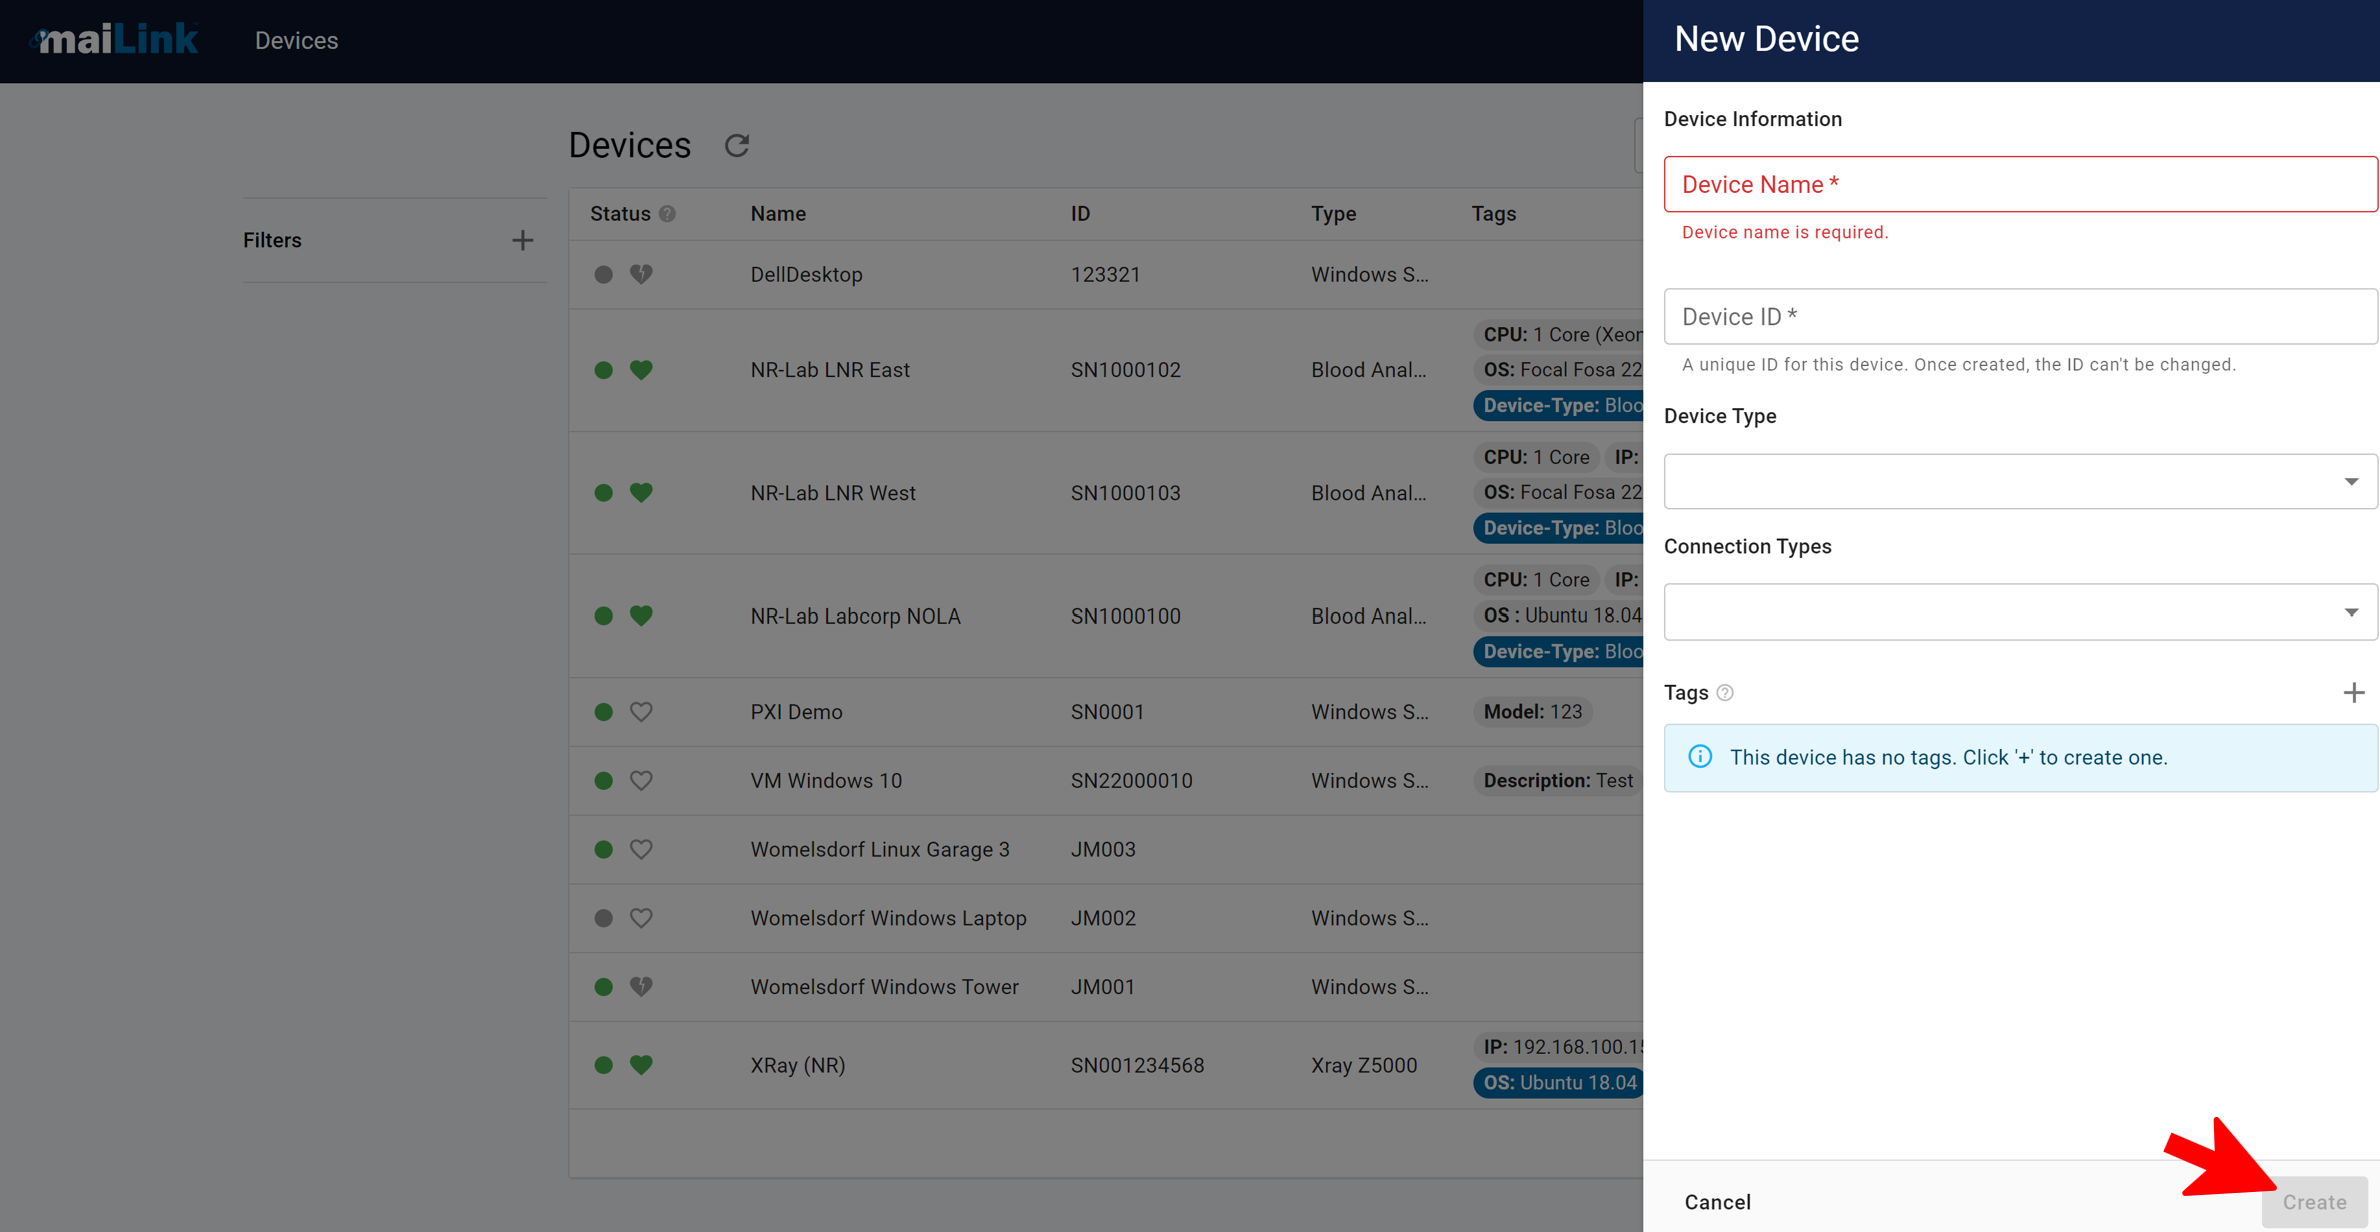
- Click Create to save the settings and open the Device Info page for the new device.
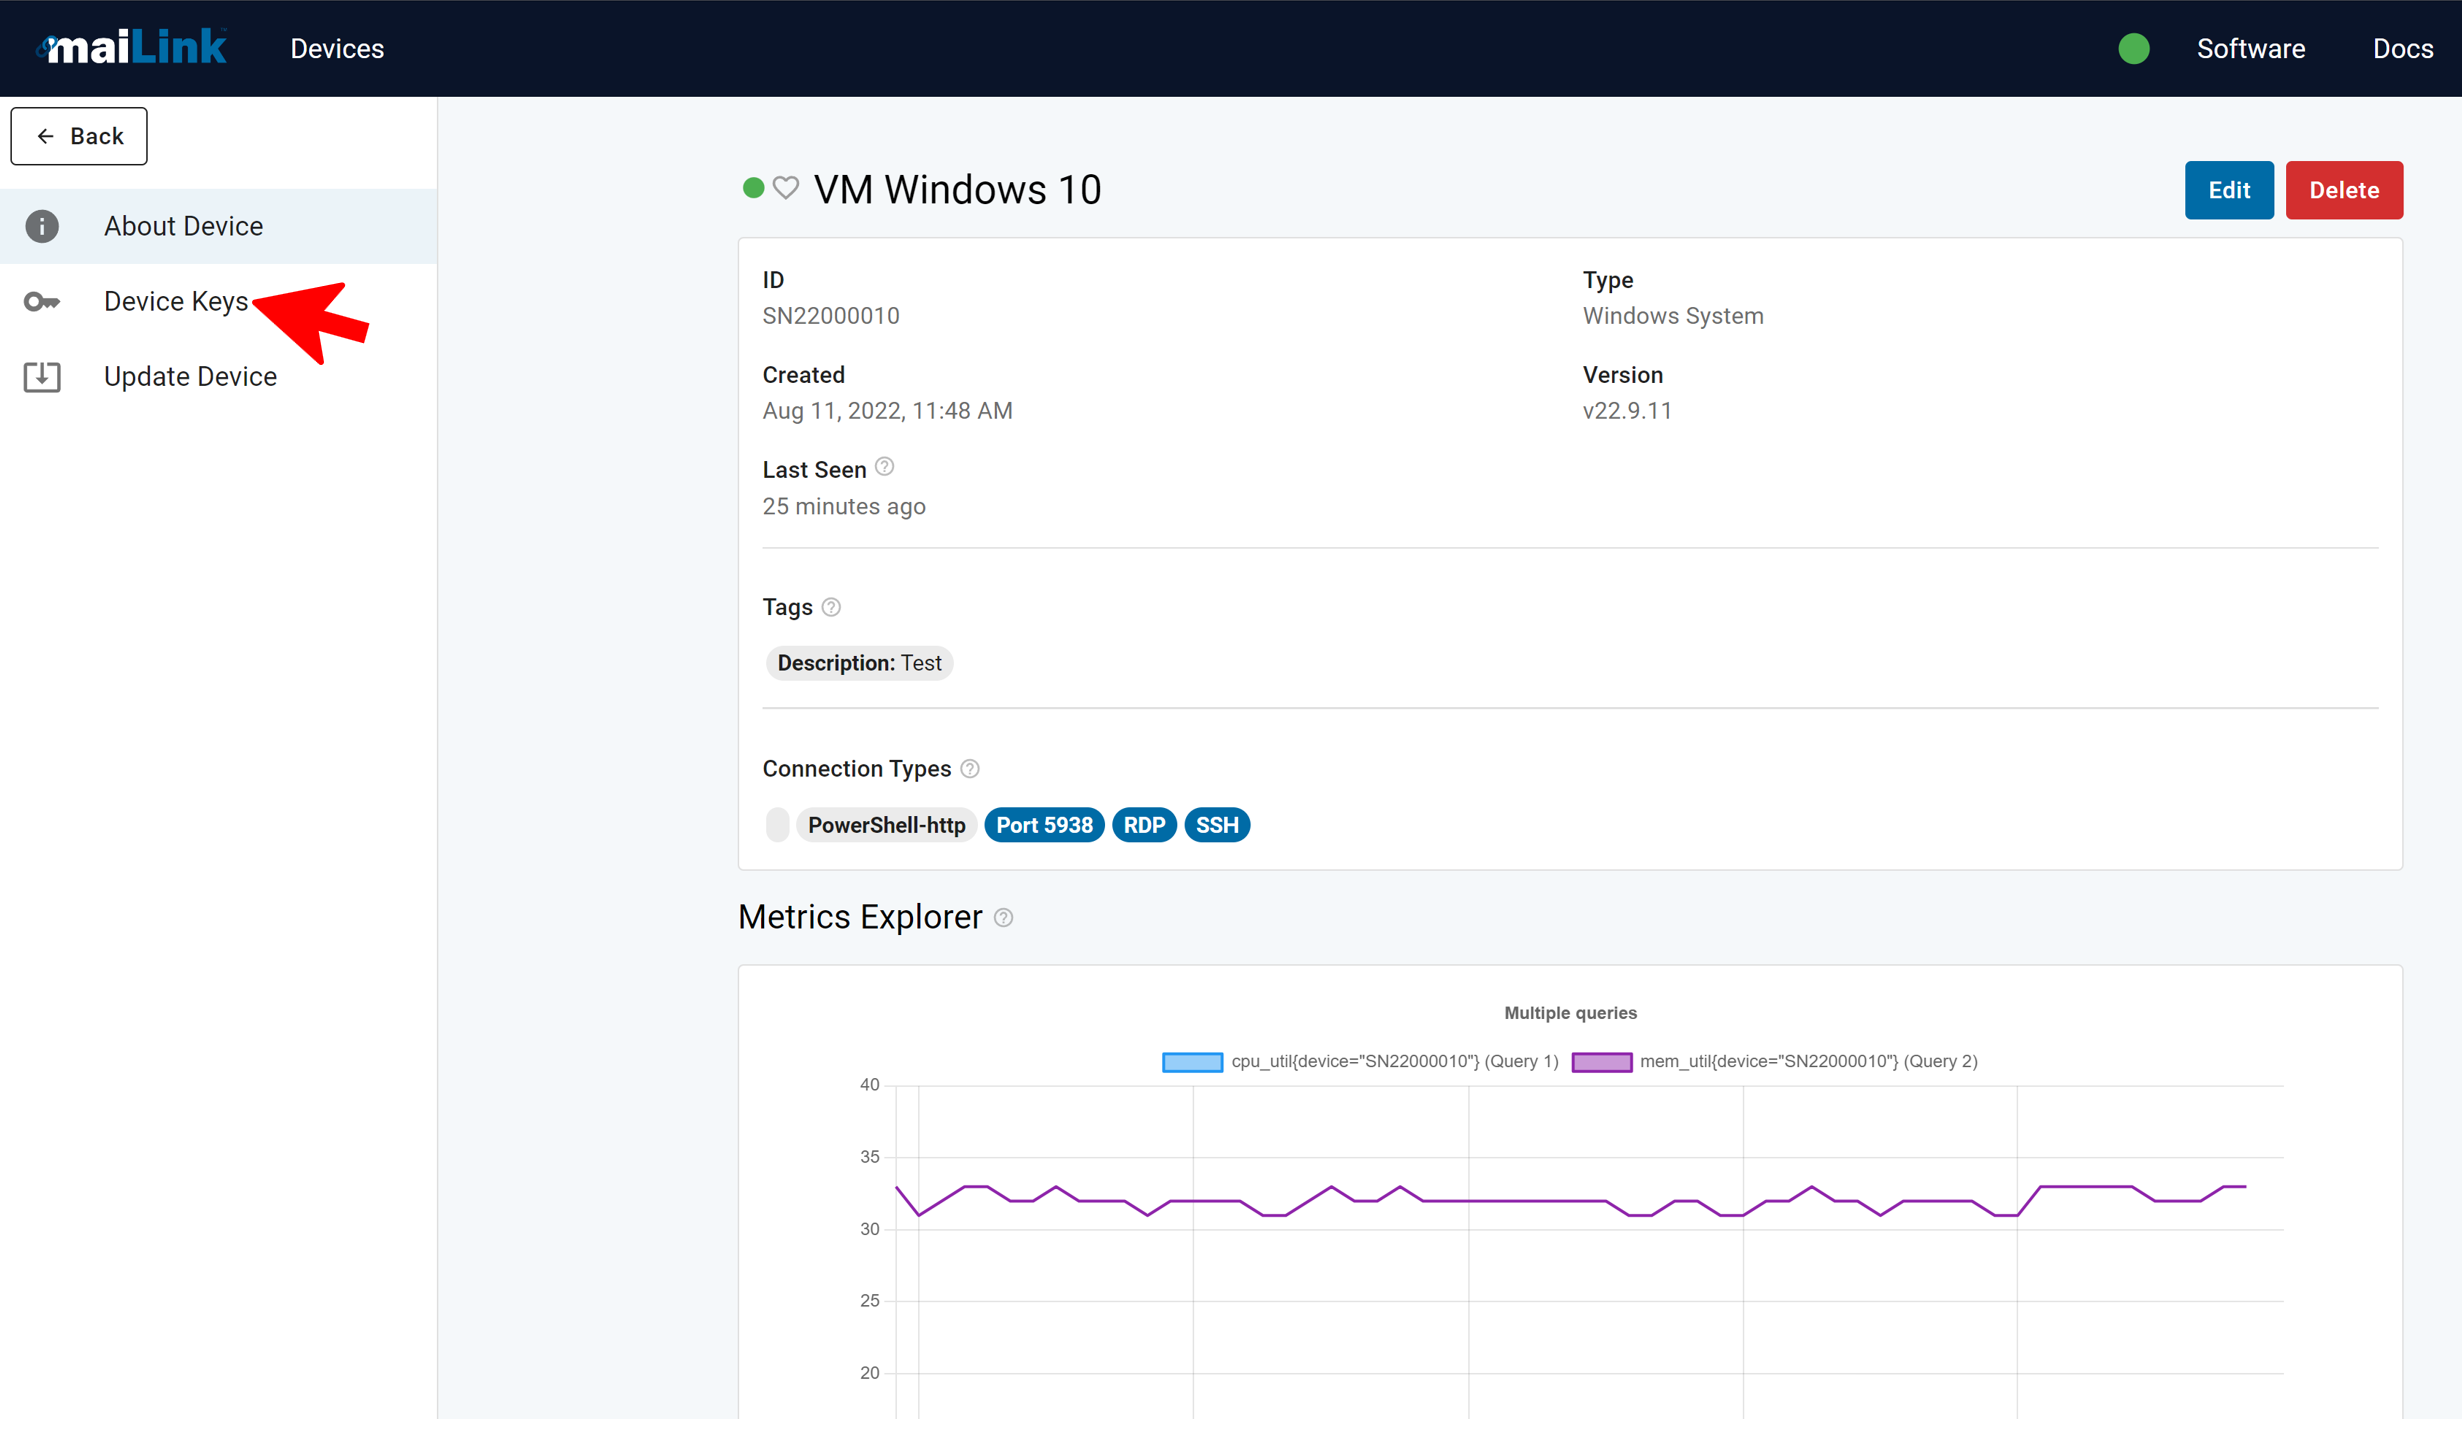
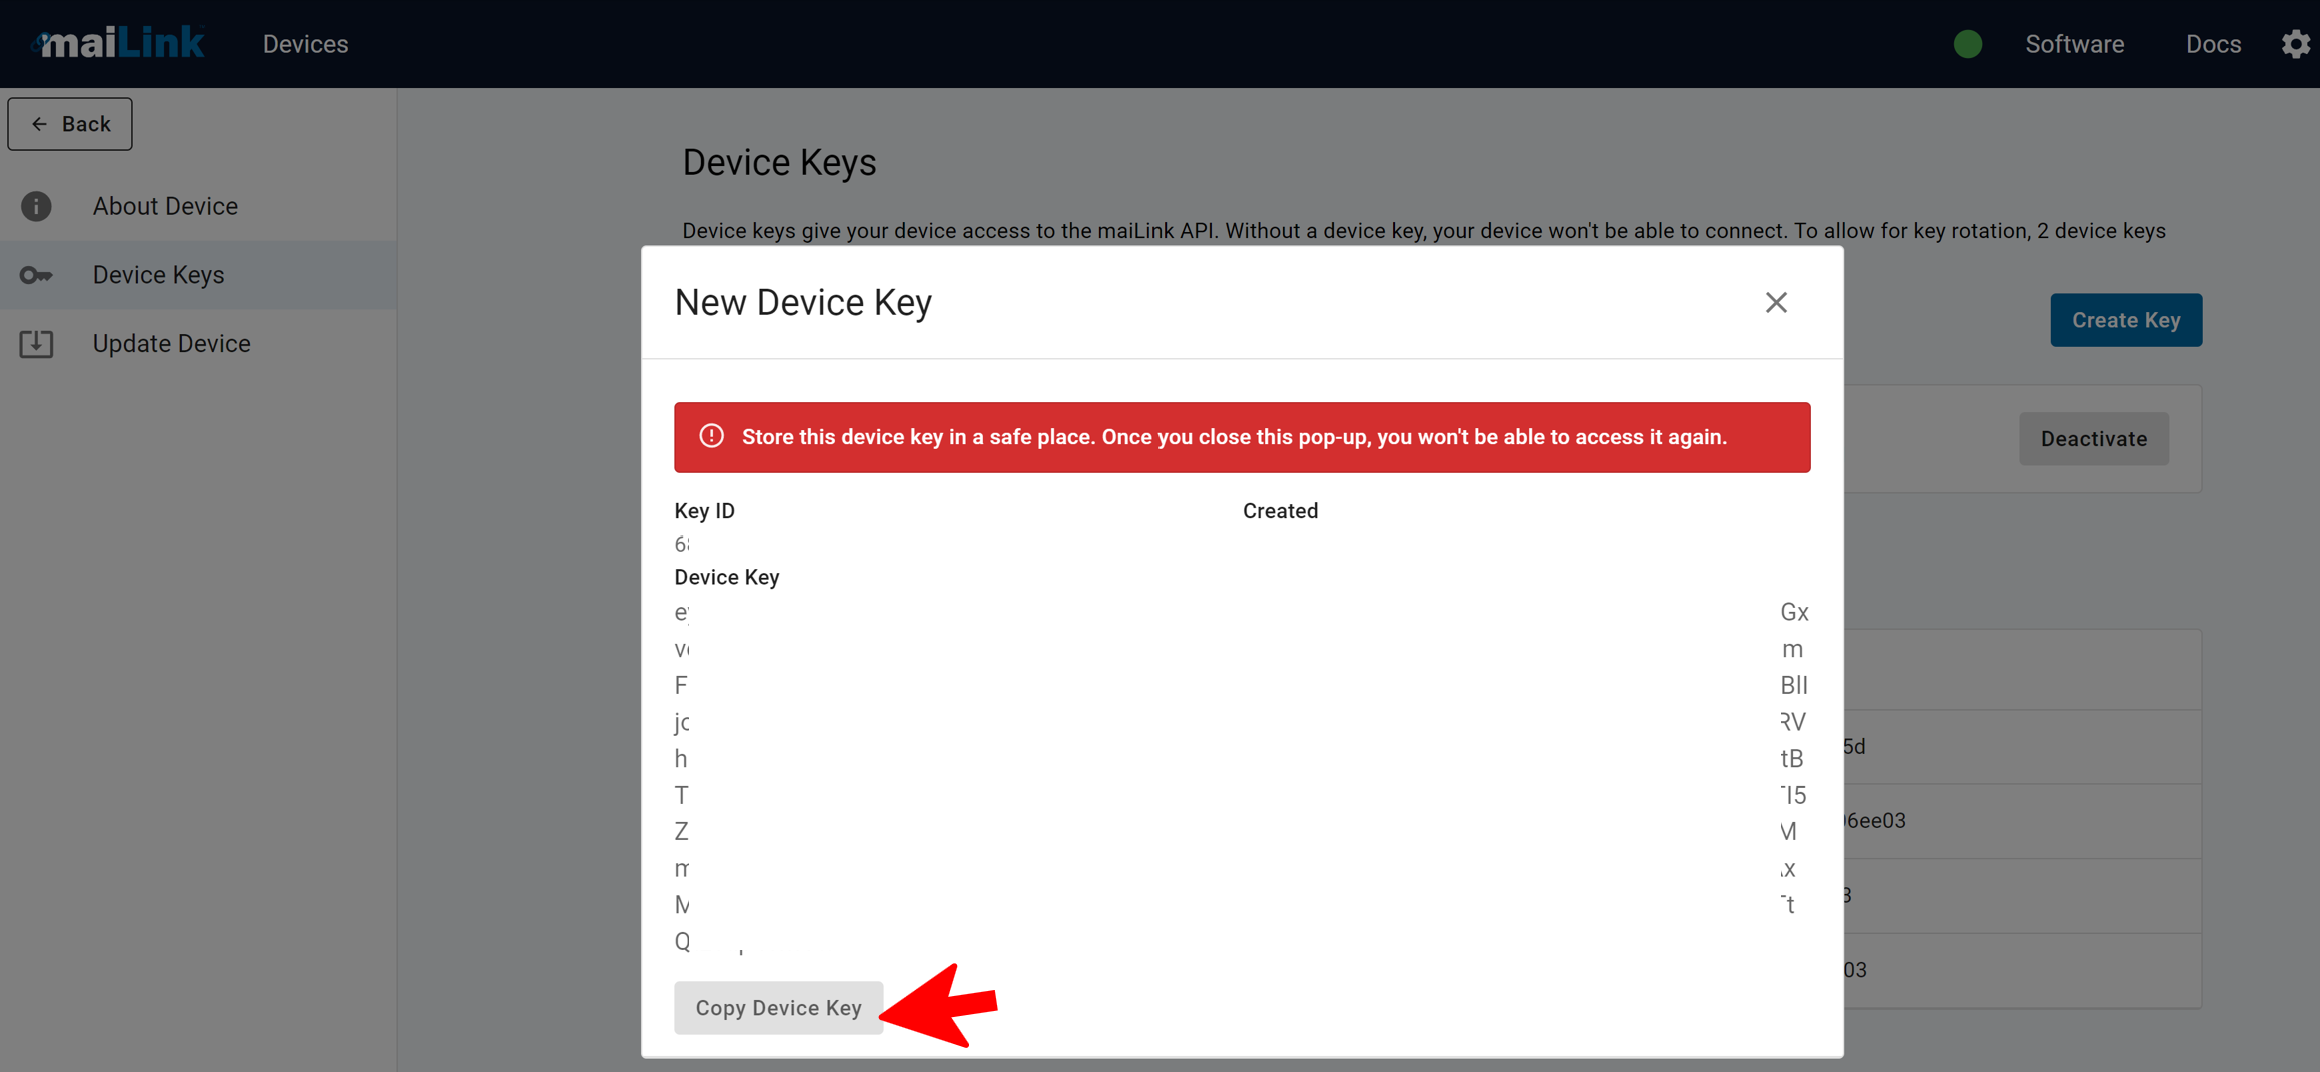
Step 3: Create a Device Key for the new device.
- Click on Device Keys side tab.
- Click on Create Key.
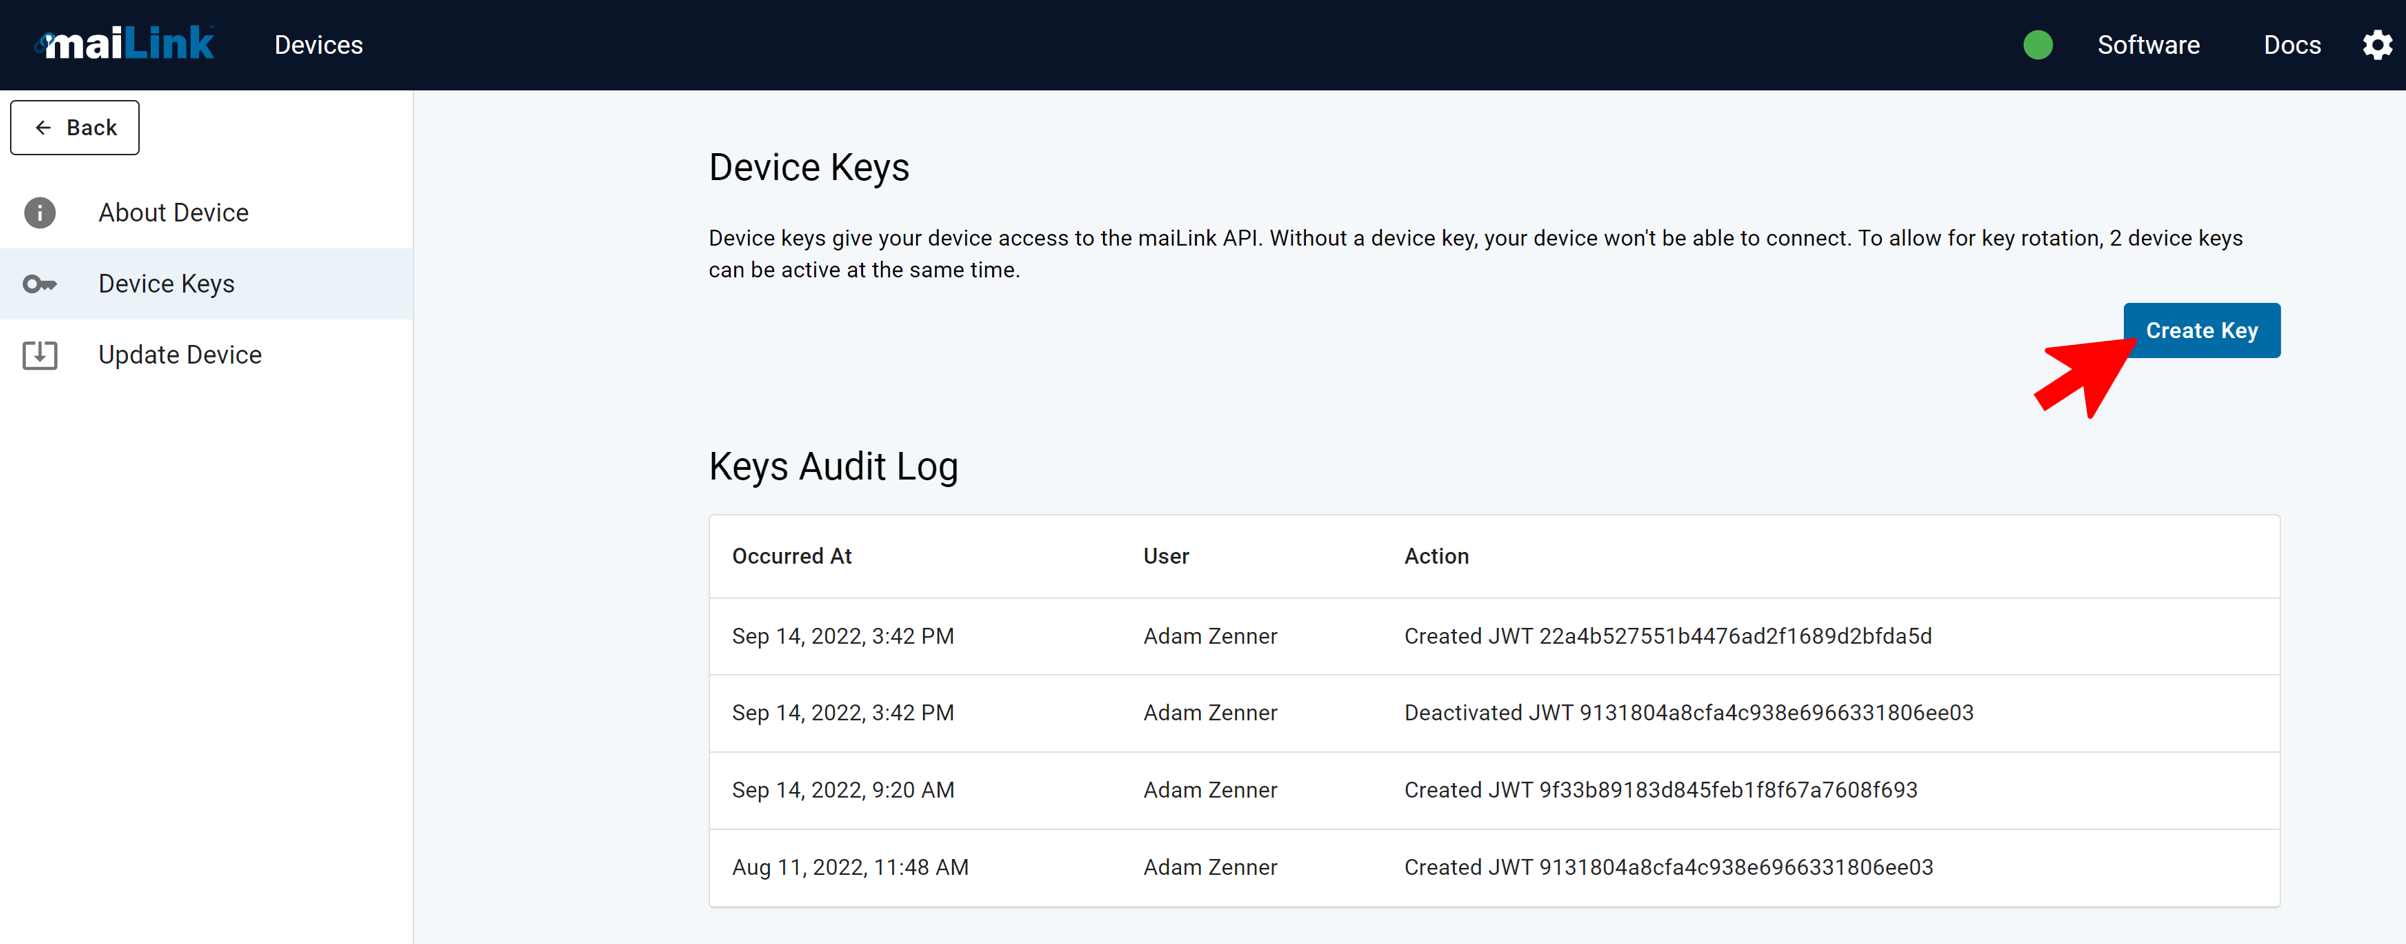
- Click on Copy Device Key to save the key to the Clipboard.
Step 4: Finish the Agent Installation
- Return to the Agent installer on the remote device.
- Paste the content of the clipboard (Right Click or Ctrl + Shift + V) into the Installer screen, and then hit
. - The installer will complete as follows…
Unpacking mailink-agent (22.9.11) ...
Setting up mailink-agent (22.9.11) ...
 Setting permissions
 Creating logging directory
 Creating linux configuration file
 Creating plugin directory structure
 Setting up service
- Verify the Agent is running by running this command
sudo systemctl status mailink-agent.service
Output
● mailink-agent.service - maiData maiLink Service
   Loaded: loaded (/etc/systemd/system/mailink-agent.service; enabled; vendor preset: enabled)
   Active: active (running) since Mon 2022-09-19 20:18:02 UTC; 1min 29s ago
 Main PID: 7713 (mailink-agent)
    Tasks: 13 (limit: 500)
   CGroup: /system.slice/mailink-agent.service
           ├─7713 /usr/bin/mailink-agent run --mailink-home /etc/mailink
           └─7784 /etc/mailink/mailink-agent-plugin serve
Step 5: Verify the Agent is Connected
- Navigate to the Devices page in the maiLink webpage.
- Verify that the device is connected to the maiLink SRM Cloud by observing a small solid green dot in the upper left section of the “About Device” page.
Success!
The new device is now connected. If you have the maiLink Client installed on your machine, you will be able to access the new device remotely.
If you have issues, contact your Administrator or email maiData Customer Support at maiData at service@maidata.io.